 Christmas baking has been something that I’ve been doing for a while now. Before kids, and even before I was married, my mother-in-law would have me over for a traditional Christmas baking session at her place (I was, and still am, excited to be a part of this big group and learned so much from their years of experience). As a pre-teen and teenager my best friend and I would I would bake together all the time. She even hosted cookie exchanges in those early years, before we had our own homes to host them in. I’ve learned so much from these experiences and love the way that baking brings people together.
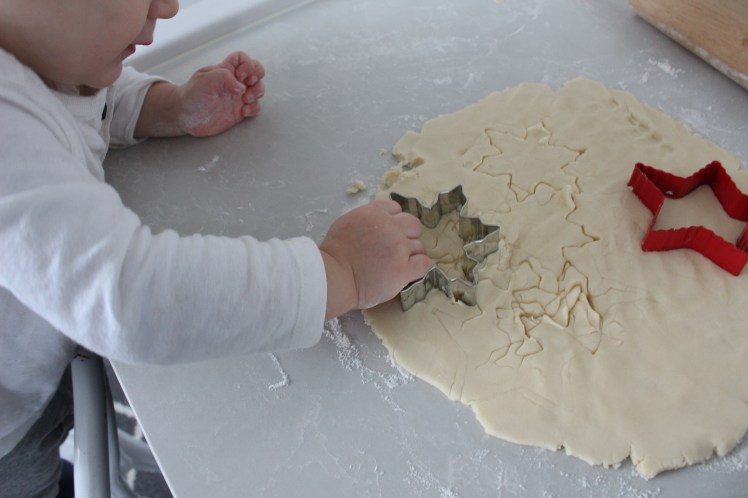
Recently, my toddler (who isn’t even two yet) has become very interested in cooking and baking. Whenever he sees my husband or I in the kitchen making something he runs over and says “me make…mommy make” and proceeds to empty out all of our pots, pans in an effort to be a part of this “making.” So I’ve decided that it’s obviously time for him to be a part of this experience and I am kind of excited to potentially have another baking partner in the future. Or potentially two, my youngest son was watching the whole thing and maybe he will want to “make” soon too!

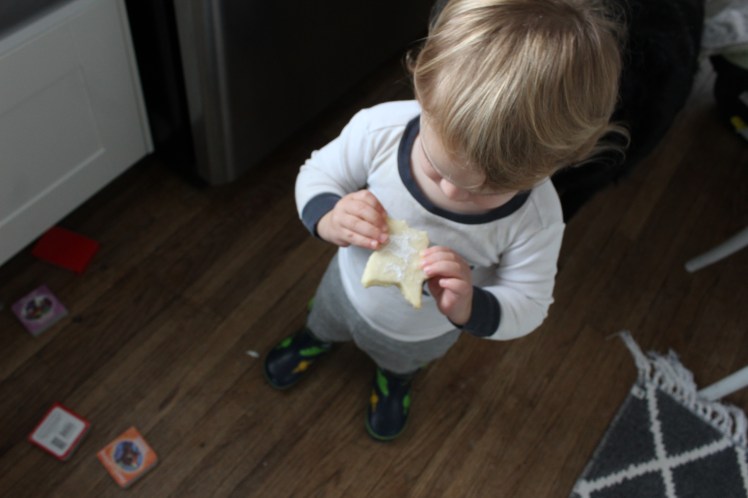
It took me a little while to decide on what we should “make” together because I wanted him to participate as much as possible and for that to be a safe, but also fun experience for him. So shortbread was my solution. It’s easy, has only three ingredients (none of which are raw eggs … I knew he would be eating that batter faster than we could roll it out) and he gets to make little fun shapes that he’s starting to recognize! He’s also learning that Santa really likes cookies and daddy thinks it would be a great idea to leave some out for ‘him’ on Christmas Eve, wink!
Santa’s Shortbread

INGREDIENTS
1lb butter, softened
¾ cup white sugar
4 cups white flour
1 tsp icing sugar (optional)

DIRECTIONS
- Preheat oven to 300 degrees F.
- Cover two baking sheets with parchment paper.
- Cream butter and sugar using a spoon or mixer.
- Add flour to your creamed mixture and combine with hands until the ingredients form dough.
- Using a floured rolling pin, roll out your dough onto a floured surface. Roll to approximately 1/4inches thickness.
- Cut out shapes using a floured cookie cutter and place on baking sheets. You may need to re-roll your dough a few times to fit the shapes.
- Chill cut cookies for 10 minutes (this helps the cookies keep their shape)
- Bake until golden brown.
- Let cool for about 10 minutes, then sift icing sugar over warm cookies.

*Tip: Be sure to cream the butter and sugar ahead of time, this makes the needing of your dough a lot easier. I can say that I’ve learned this from experience because the first time I made these I missed that step and it made for some serious dough wrestling. Let’s just say I won’t ever need to lift a weight again if I keep skipping this step.
I love this recipe and use it all the time. It’s so versatile and I almost always have all of the ingredients in my pantry/fridge so it’s great to whip up last minute. It’s also a great make-ahead recipe. Check out the details on how to make this ahead of time here.
Merry Christmas and I hope Santa likes his cookies!
xoxo

Yumm!! Happy holidays !
LikeLike