 My husband and I are kind of “DIYers” he’s the Home Depot kind of doer that can renovate a kitchen from scratch and I love to decorate, cook or bake. Recipes and DIY decorating projects are exciting for me, I know super nerdy right, but I love the feeling that you get when you create something or give someone a gift that you’ve made! There’s something about sharing the food you’ve made or a handmade gift that makes it kind of special. So I’ve decided to share some of my favourite Christmas DIY projects (which includes a candied nut recipe that I love) with all of you.
CANDIED NUTS
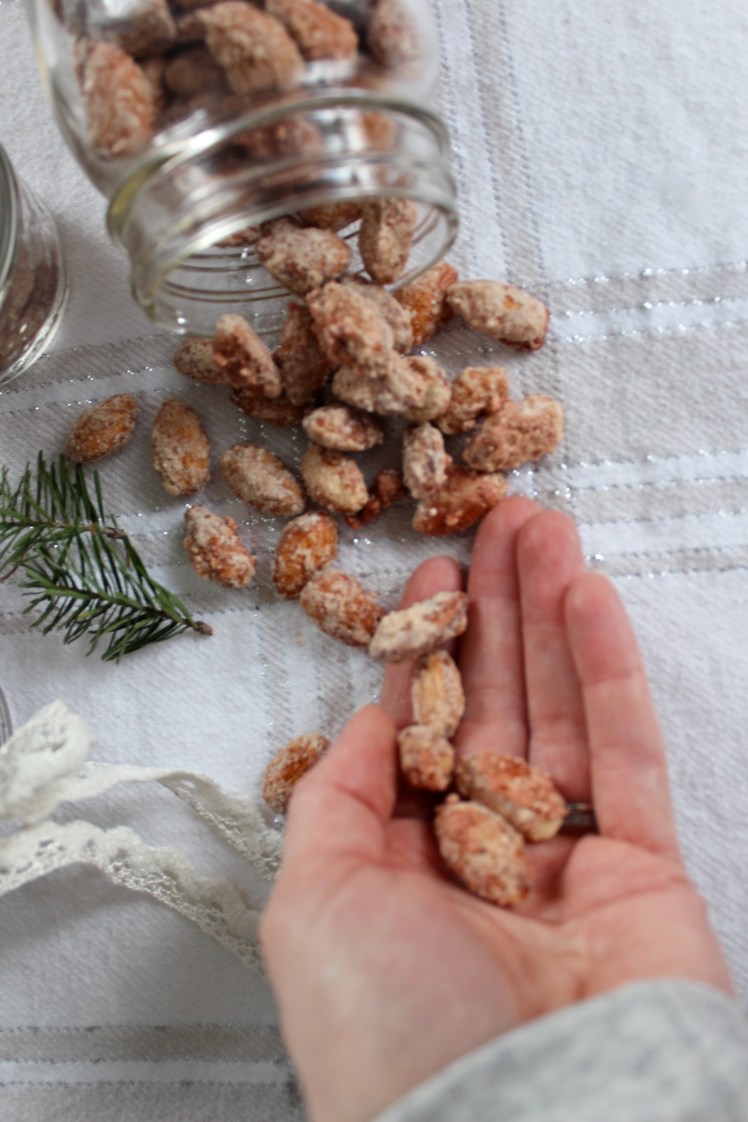
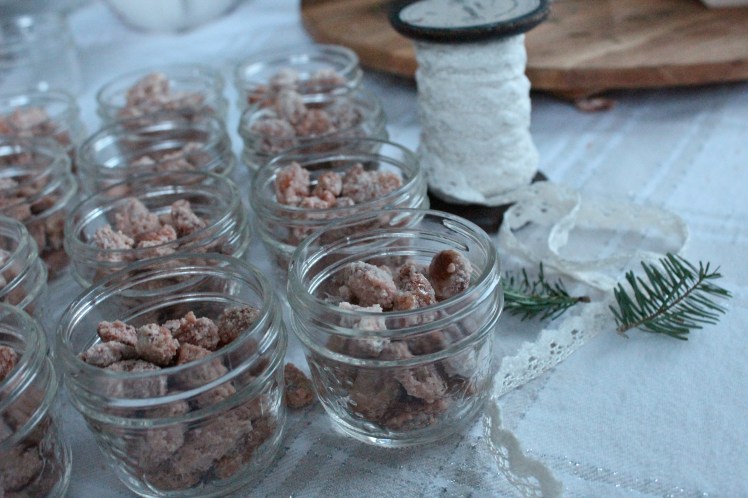
 Candied nuts are something that my mother-in-law taught me how to make years ago. The recipe is so simple and it’s become a big part of our lives. We gave out jars of these nuts at our wedding (again hand made gifts) that were made by MIL, her best friend and my husband’s grandmother. I was so touched that they wanted to be a part of this DIY project. In keeping with a family tradition that I’ve learned from my husband’s side, I make them every Christmas to give to our family and friends. This recipe has been around for years; it’s been tweaked, made savoury and shared for generations. The version I’m sharing with all of you is one that I’ve adapted and made into my own. I learned how to cook from my mom and grandmother, but baking is a whole different story. My mother-in-law and, of course, Martha Stewart brought baking into my life and I am so happy to share some of the recipes I’ve adapted along the way with all of you!
CANDIED NUTS
INGREDIENTS
 2 cups almonds
½ cup white sugar
½ cup brown sugar
½ cup water
DIRECTIONS
- Mix sugars together in a small bowl until they are well combined.
- Pour almonds, sugar and water into a large, non-stick frying pan and cook for approximately 10-15 minutes on medium high heat, stirring constantly with a wooden spoon. Mixture will bubble, then become powdery white and then it will glaze. Keep stirring until the nuts are well coated and covered in the glaze.
- Turnout nuts onto a baking sheet or breadboard and separate. Let the nuts cool before packaging.
*Note: these can be made with all white sugar as well.
DIY CHRISTMAS WRAPPING

I’ve been on the hunt for plain packaging paper to use for Christmas wrapping for years and this year I finally found out that you can get it from the post office! When I finally found some and had it in my cart I was way to excited. I told everyone about this and couldn’t wait to start wrapping, well decorating the gifts (my husband does a way better job with the wrapping part) I add the decorations. The paper from the post office is durable, plain (so you can add your own special touch) and it’s affordable! This year I found some beautiful ribbon and tags from Marshalls Canada and the trimmings from our tree were the perfect finishing touch.

Pine Cone Ornament Project
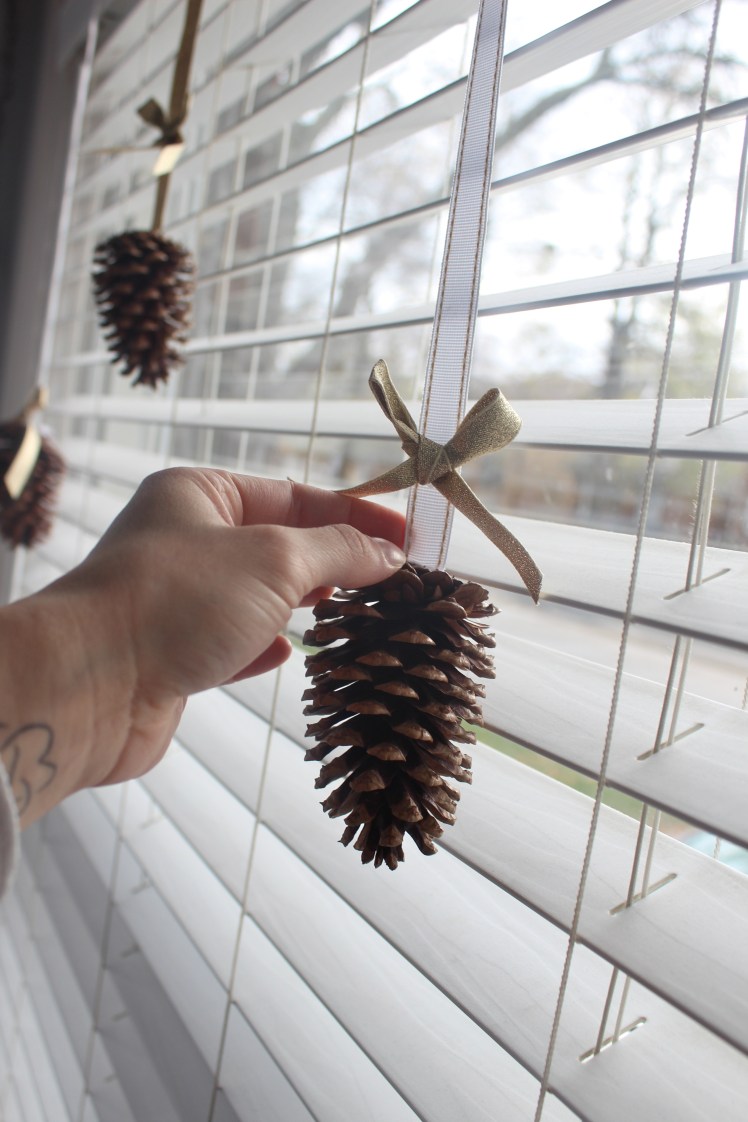 Last year I had an abundance of Pine Cones, I don’t really remember why, but I had them. I also had some gorgeous ribbon that I was using to decorate the nut jars and decided that hanging the pinecones would be a nice way to decorate the house or the tree. This project is so simple.
Step 1: Tie a little bow with some ribbon.
Step 2: Glue a longer piece of ribbon to the bottom of a pinecone using a glue gun.
Step 3: Attach the little bow to the longer ribbon with a small dot of glue or just tie it on.
These are just a few of my favourite Christmas DIY projects and I am so happy to share them with all of you. Let me know how it goes if you give these a try 🙂
MERRY CHRISTMAS & HAPPY HOLIDAYS!
XO
